Warning: This tutorial contains lots of freakin' pictures mayne!
Also, though this tutorial may seem "long" making the process of creating poses seem "long" it is really not that long. I have merely simplified orangemittens pose tutorial at MTS with a few more pictures, and simplified instructions for those of us who really need detailed tutorials. I have also added another step at the very end of this tutorial. This step is what prevented me from creating custom poses for so long because it was left out of orangemittens tutorial.
Also keep in mind that custom poses are actually very much easier than creating CC. Any person can do it really. Let's start off with what you'll need:Blender 2.57 |
Pose Player |
S3PE |
AnimToolV05 |
Blender SMD Tools 0.15.10 |
Custom Pose FilesBefore beginning the following tutorial. Please install the "Blender SMD Tools0.15.10" that you downloaded by following the mini tutorial below:
- Quote :
1. Start Blender and go to File->User Preferences(or press CTRL+ALT+U).
2. Click the "Add-Ons" button at the top of the User Preferences window.
3. Click the "Import/Export" button on the left, then click the "Install Add-On" button at the bottom.
4. Navigate to where you extracted the file and select the "io_smd_tools.py" and click "Install Add-On". TS3 Tools is added to the the list.
6. Click the check box to the right of the "Import-Export: SMD/DMX Tools"
7. Close the User Preferences window, and hit CTRL+U to save as default(if you want TS3 Tools to be there next time you start Blender).
Creating Custom Poses in Blender for Dummies Tutorial Part 1Lets start by opening S3PE and opening your Custom Pose Files Folder. In your Custom Pose Files Folder you will see a file named: 'a_xevt_701_clip'. Drag and drop this file into S3PE. If you get a prompt that looks something like this...

...just click okay and then another prompt will pop up that will look like this...

...click "NO".
Now right click on the clip file in S3PE and click "Export and rename..." as seen in the picture below...

A new prompt window will come up, now this is where you actually name your pose. This name is what people will type in to use your pose in game. Please make sure the pose name is unique but short, no one likes to type in a long pose name

. Also, be sure to start your pose name off with a_...
See example below:

Now click "Save". A new window will pop up, this is where you choose to save your new clip file. I suggest making a new folder where you store this poses files, I usually name my new folders after the code, for example:
I just made a new pose named: a_evie_21
I named my folder: a_evie_21 and saved it on my desktop.
View example below:

Now click "OK".
You may now close S3PE. (If a prompt pops up, click "no")
Now, open up your "Custom Pose Files" Folder. For this tutorial we will be making a female pose. So you will need to click the "af" file copy this file either by pressing ctrl+C or right click and copy, now paste this file into your new pose folder. Go back to your "Custom Pose Files" Folder and open the "Adult Female Rig Text" folder and copy that file and then paste it into your new pose folder. Your pose folder should now look something like this...

...Now open up your AnimTool and click the "Clip - > SMD" button as seen below...

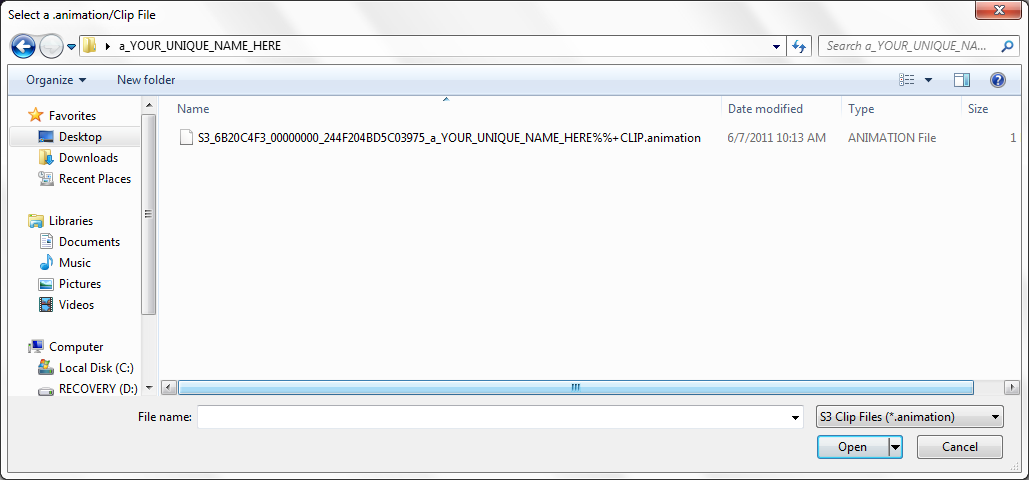
...A new window will now pop up, here is where you will need to locate your new pose folder and find your CLIP.animation file as seen below...

...click "Open". A new pop up will pop up that looks like this...

...click on "OK" and navigate to your new pose folder again and select the "adult_rigfile" Text Document and click "Open", example seen below...

...Your AnimTool Program should now look like this:

...It is now safe to close the AnimTool Program. If it does not say "No Errors" in your AnimTool as it does in the pic above, please delete your new pose folder and start over from the beginning of this tutorial.
Now open Blender.
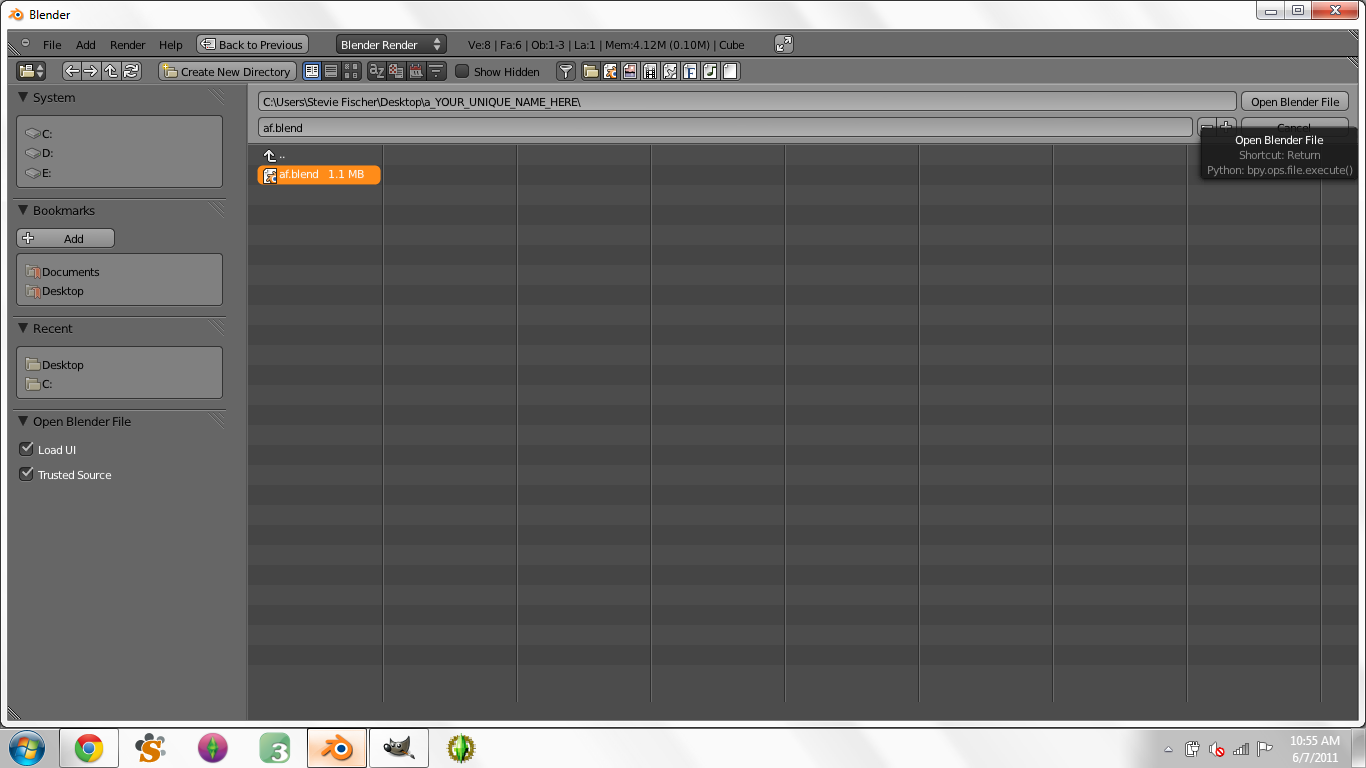
Click File and Open once your in blender, example image below...

Now locate your "af" file that you pasted into your new pose folder,click it, and click open blender file in the top right corner, see example below...

...next go to file in the top left corner again, hover over "import" and click "Source Engine (.smd, .vta, .dmx, .qc)" as seen in the example below...

...now locate your CLIP.smd file, it should be the only file that shows up at this point, if not then navigate to your pose folder again to find it. Click "Import SMD/VTA, DMX, QC" located in the top right corner. See example pic below...

...now hover your mouse over the 3d body you see in the screen. Press 1 on your keyboard and then press shift and 2. Your model should now look like this...

...next look to the left of your screen, find the little icon that looks like a person with their arms and legs out with the word "Pose" next to it, click that, the orange dots on your model should now be black... now click the little plus sign next to the little person and word "pose". See example below...

here is where you will work on your pose...
Creating Custom Poses in Blender for Dummies Tutorial Part 2Blender Hotkeys:
A - Select entire model (pressing a again will deselect the entire model)
B - Select a section of the model (draw a square over the joint you want to move)
R - will rotate whatever joint you have selected (pressing R again will rotate a different way)
G - grab and move selected joints/joint
Ctrl + Z - Undo
In the picture below you will see a section in blender where you can choose what specific angle of the model you want to look at. This section is important for creating poses.

Now after you have created you pose press a on your keyboard until all of the dots highlight blue (if they do not highlight press a again)
Once they are highlighted press I on your keyboard and select "L
ocRot as seen below...

Next select File in the top left corner, hover over Export, and select "Source Engine (.smd, .vta, .dmx, .qc)" and click as seen below:


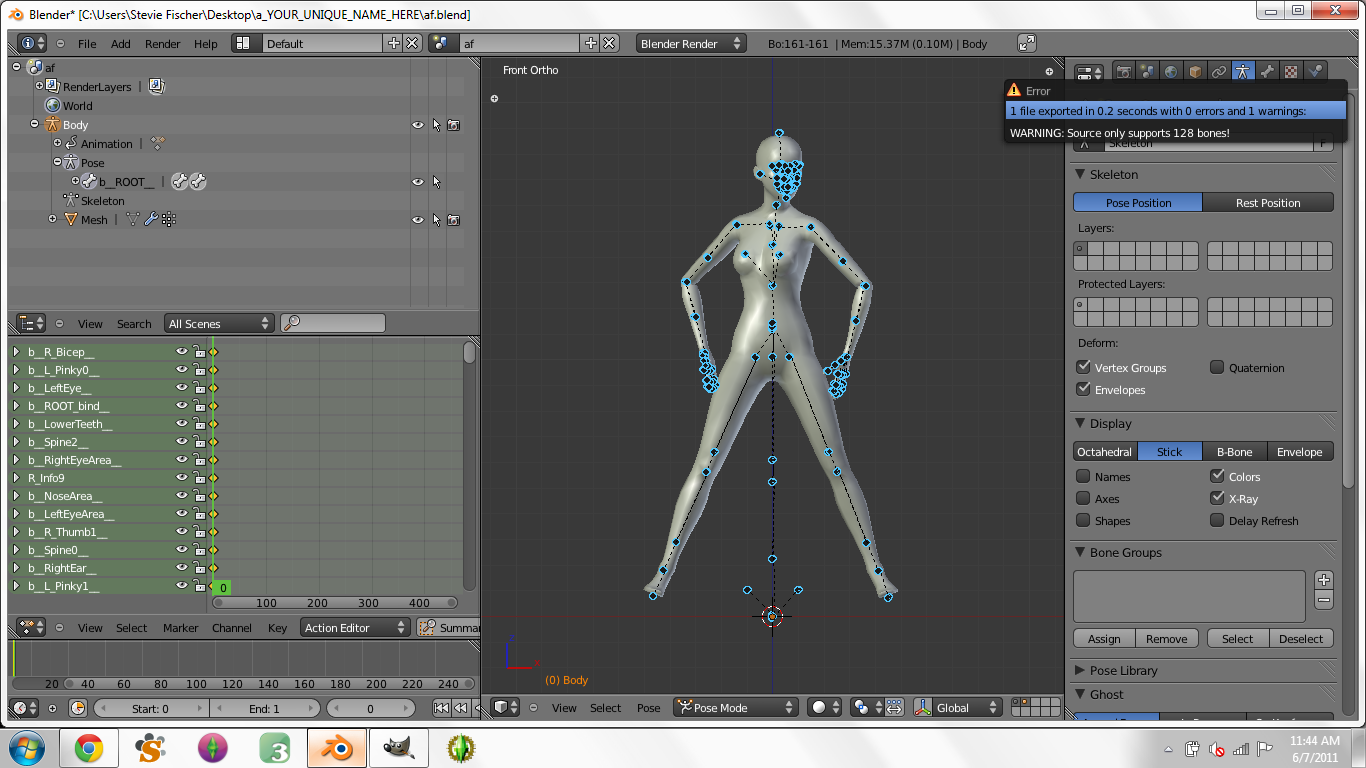
...now click "Export SMD/VTA" in the top right corner as seen below...

A warning will pop up as seen in the image below, just ignore it.

It is now safe to close blender...
Now open your new pose folder. A new folder should now be inside named "anims". Select the file with the extension ".smd", right click, and select rename. Press Ctrl + C on your keyboard. The name of this file should now be copied to your clipboard.
Now open the "anims" folder and select the file inside. Click rename and paste what you have copied. Now replace the .smd file inside your pose folder with the newly renamed .smd file inside your anims folder.
(I usually just drag and drop and click "move and replace")
Next open your AnimTool and select "SMD - > Clip" as seen below...

Navigate to your new pose folder and select the .smd file and click open. Your AnimTool should now look like this...

It is now safe to close your AnimTool.
Next open S3PE and your new pose folder.
Drag and drop the file with the extension "CLIP.animation" from your pose folder into S3PE. When the following prompt pops up click "OK"

Now click on the CLIP file in S3PE and select Resource from the navigation bar and hover over "Export", then click "to package". Example below...

Now name your package and save it somewhere you can find it.
It is now safe to close any programs you may have open. Drag and drop your new package into your mods/packages folder. Run your game, and try your pose in game!
Be sure to make sure you have followed this tutorial perfectly before reporting problems. :D
Tips:a lot of tips can be found on orangemittens tutorial over at MTS. Link is at the beginning of this tutorial.
Don't ignore the hands! there is nothing worse than creating a great pose with stiff hands.
If you would like to make your poses combined as a set, follow the tutorial for every pose you make and drag and drop all CLIP.animation files into S3PE, select them all and export to a single package.
I hope you guys like this!


